Building a Compact Cyber Security Home Lab with Proxmox
Proxmox ile Kompakt Bir Siber Güvenlik Ev Laboratuvarı Kurulumu
Mon Dec 08 2025
Category: Research
Introduction: Repurposing Old Hardware
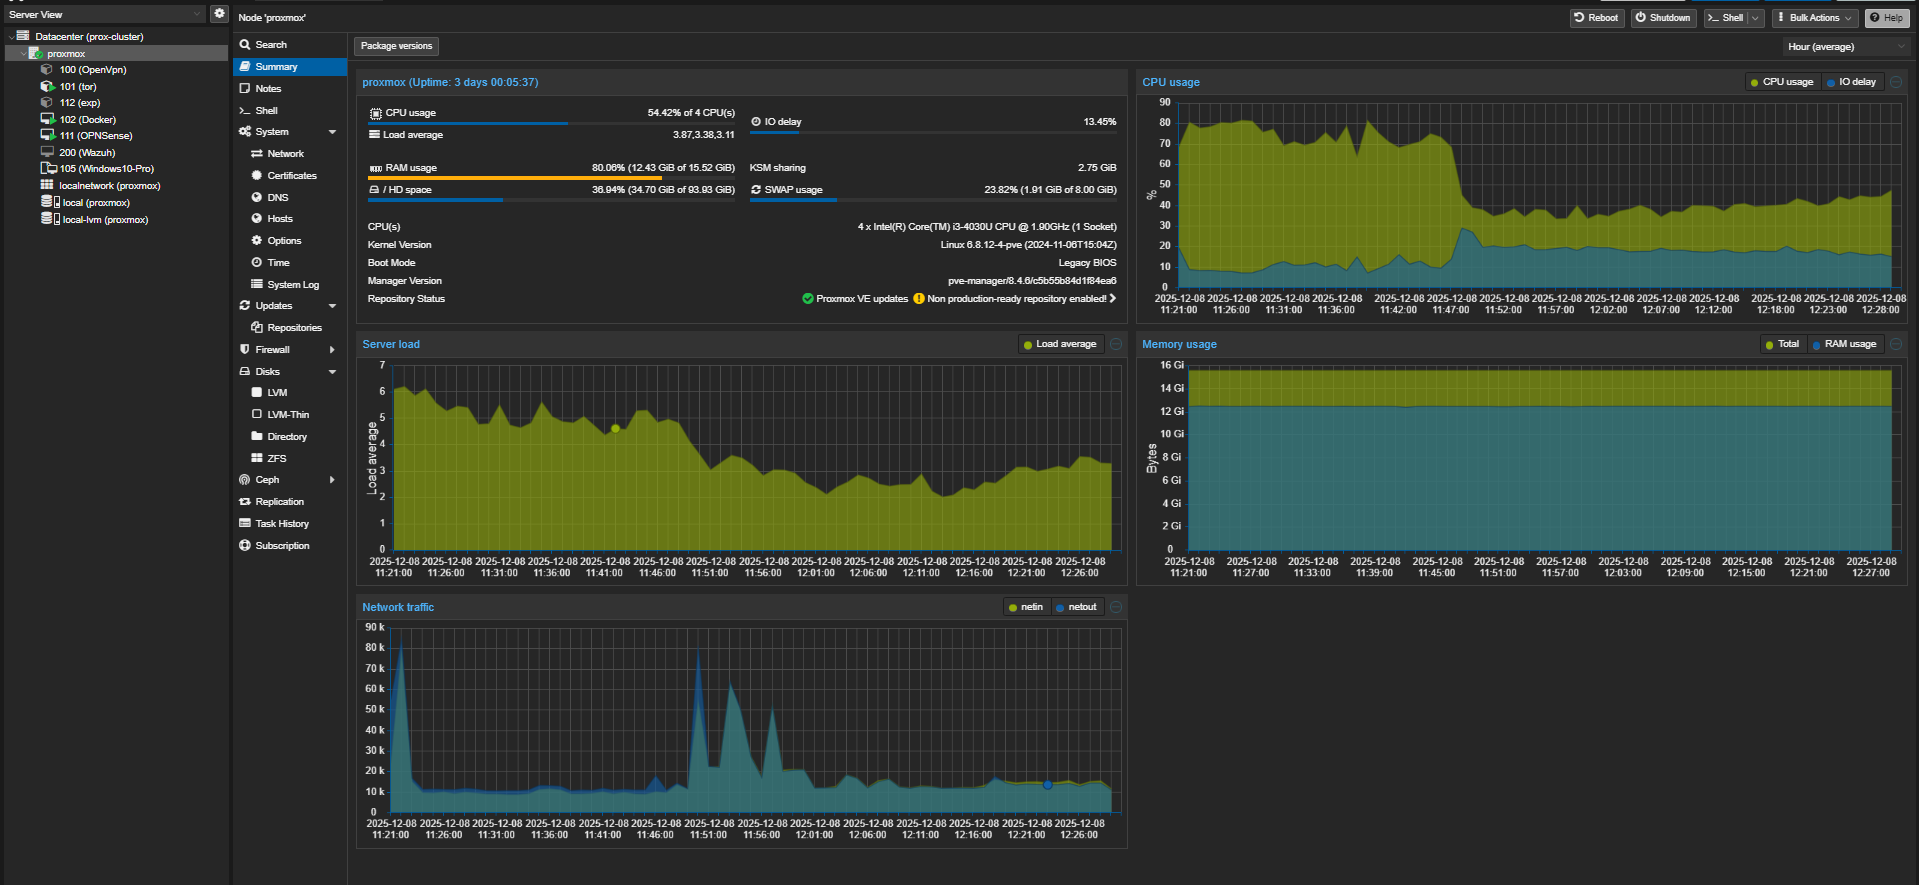
I had a small notebook with 16 GB of RAM and a 4-core Intel(R) Core(TM) i3-4030U CPU @ 1.90GHz. Instead of letting it gather dust, I decided to transform it into a portable, isolated, and powerful lab environment for my cyber security research. The solution? Proxmox VE.
In this post, I'll explain exactly what Proxmox is, the nuances of its installation, and the details of the 4 critical virtual machines (VMs) running on it.
What is Proxmox VE?
Proxmox Virtual Environment (VE) is an open-source, Debian-based "bare-metal" hypervisor used for enterprise virtualization management. Unlike VirtualBox or VMware Workstation, it doesn't run on top of an operating system; it is the operating system.
It combines two powerful technologies:
- KVM (Kernel-based Virtual Machine): Provides full virtualization. You can run any OS (Windows, Linux, BSD) as if it were a physical machine. It fully simulates hardware.
- LXC (Linux Containers): Provides OS-level virtualization. It is much more lightweight because it shares the host's kernel. Only Linux distributions can be run, but performance is near-native.
Installation and Configuration Tips
I installed it via a standard ISO on a USB drive. However, due to limited hardware (especially CPU and RAM), I had to make some strategic configuration decisions:
- Filesystem (ZFS vs LVM): Proxmox supports ZFS, which offers great data integrity but consumes a lot of RAM (usually 1GB+ per 1TB of storage). Since I only have 16 GB of RAM, I opted for the lighter LVM-Thin structure. This saved precious RAM for my VMs.
- Network Config (Linux Bridge): The notebook has one ethernet port and one Wi-Fi card. Proxmox can struggle with Wi-Fi cards in "bridge" mode. So, I configured the ethernet port for main management and WAN access.
- Resource Constraints: Since I have an older i3 CPU, I avoided over-provisioning vCPUs. I generally selected the "Host" CPU type to pass through all physical processor features (like AES-NI) to the VMs.
My Lab Environment: 4 Core Machines
The structure I'm currently using is designed to simulate both defense and offense scenarios:
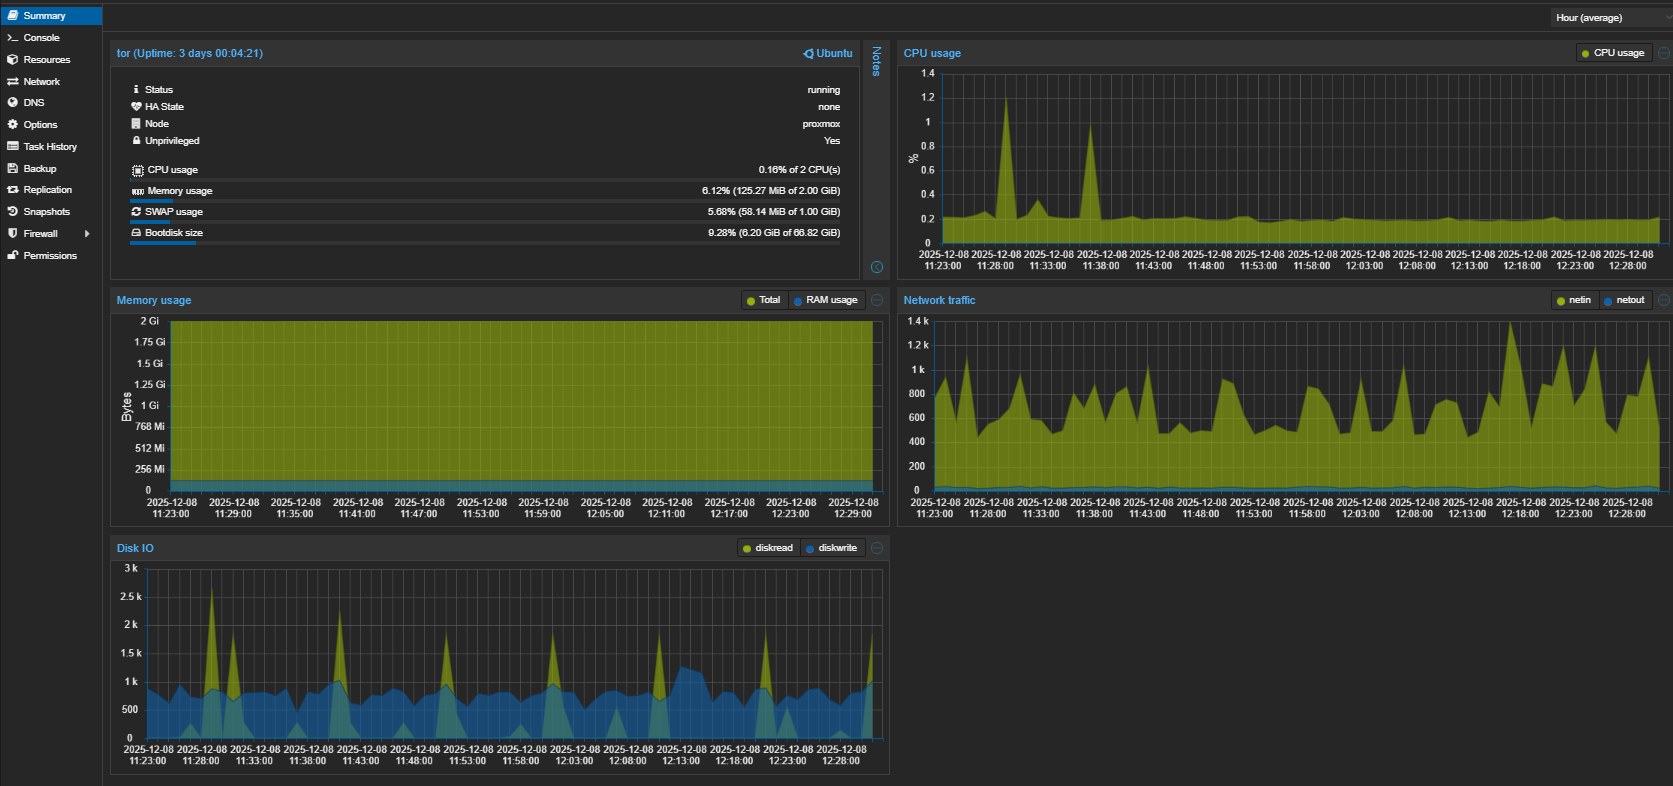
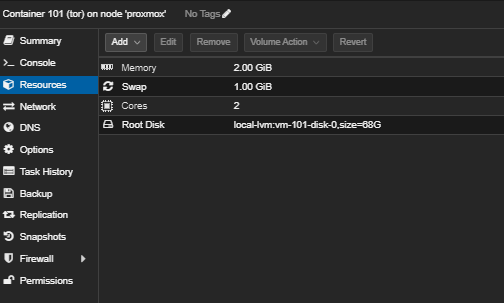
1. Tor Gateway (Ubuntu Template - VM)
This machine is the lab's "invisibility cloak".
- Detailed Setup: A minimal system built on Ubuntu Server. It can have two network interfaces or route via a single one.
- How it Works: The Tor service runs in "Transparent Proxy" mode. iptables rules redirect all incoming traffic to the Tor port (usually 9040).
- Why is it Necessary?: The default Tor service on Kali Linux can sometimes experience exit node issues. Also, using a centralized exit point is much more practical than installing Tor Browser on every machine.
- Usage Scenario: I assigned it a static local IP (e.g., 10.10.10.254). The moment I set this IP as the "Gateway" for any other VM, all traffic from that machine is encrypted and routed through the Tor network.
- Browser Integration: Instead of using Tor Browser on my main computer, I use browser extensions like FoxyProxy on Firefox/Chrome to route traffic to this machine's IP. This allows me to access the Tor network via my standard browser.
- Custom Port: I configured the Tor exit port to 65534 instead of the default. This helps in avoiding some simple port scans and managing traffic more specifically.
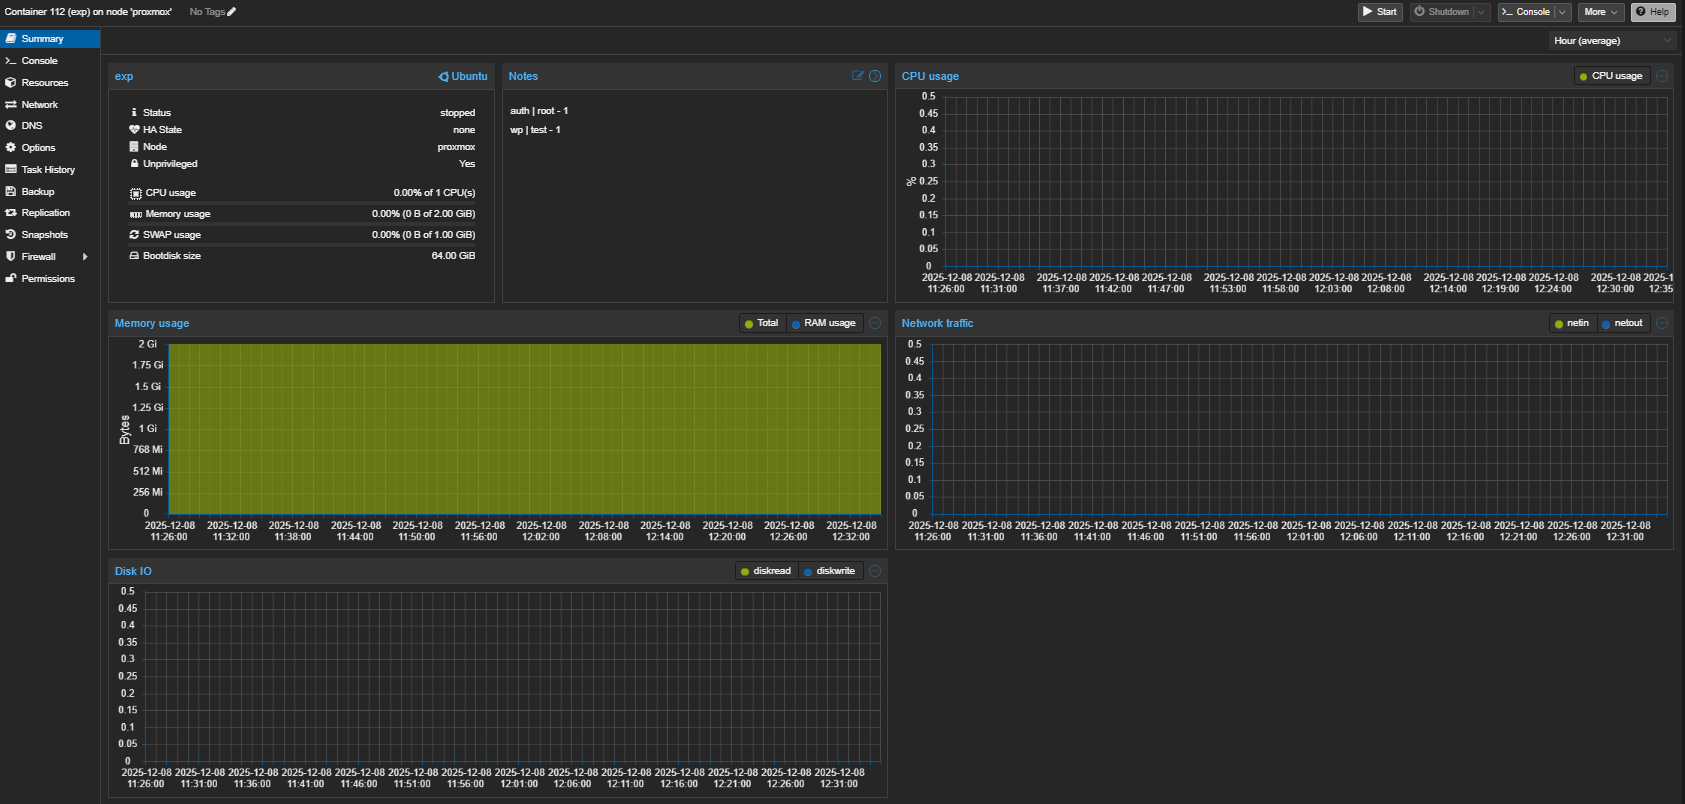
2. Exploit Development & ZeroDay Hunting (Ubuntu Template - VM)
This is my main workbench. An isolated environment prone to getting dirty.
-
Why VM?: Exploit development can sometimes crash the system or cause kernel panics. Being a VM allows me to take instant "Snapshots" and revert within seconds if something goes wrong.
-
Remote Development (VS Code SSH): Instead of using a GUI on this machine, I connect via the Remote - SSH extension in Visual Studio Code from my main computer. This allows me to write code, debug, and manage files in my comfortable environment while the code actually runs on the isolated VM. Debugging exploits with GDB integration is much more efficient this way.
-
Content:
- Web Server: Nginx is installed. I host open-source projects I suspect are vulnerable or my own test scenarios here.
- Tools: Python, GDB (debugger), Burp Suite (headless or remote), and various fuzzing tools are ready.
-
ZeroDay Hunting: I run a downloaded CMS or library here and scan it for vulnerabilities, completely isolated from the outside world.
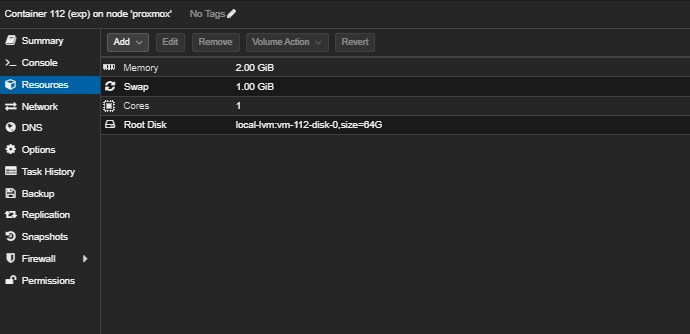
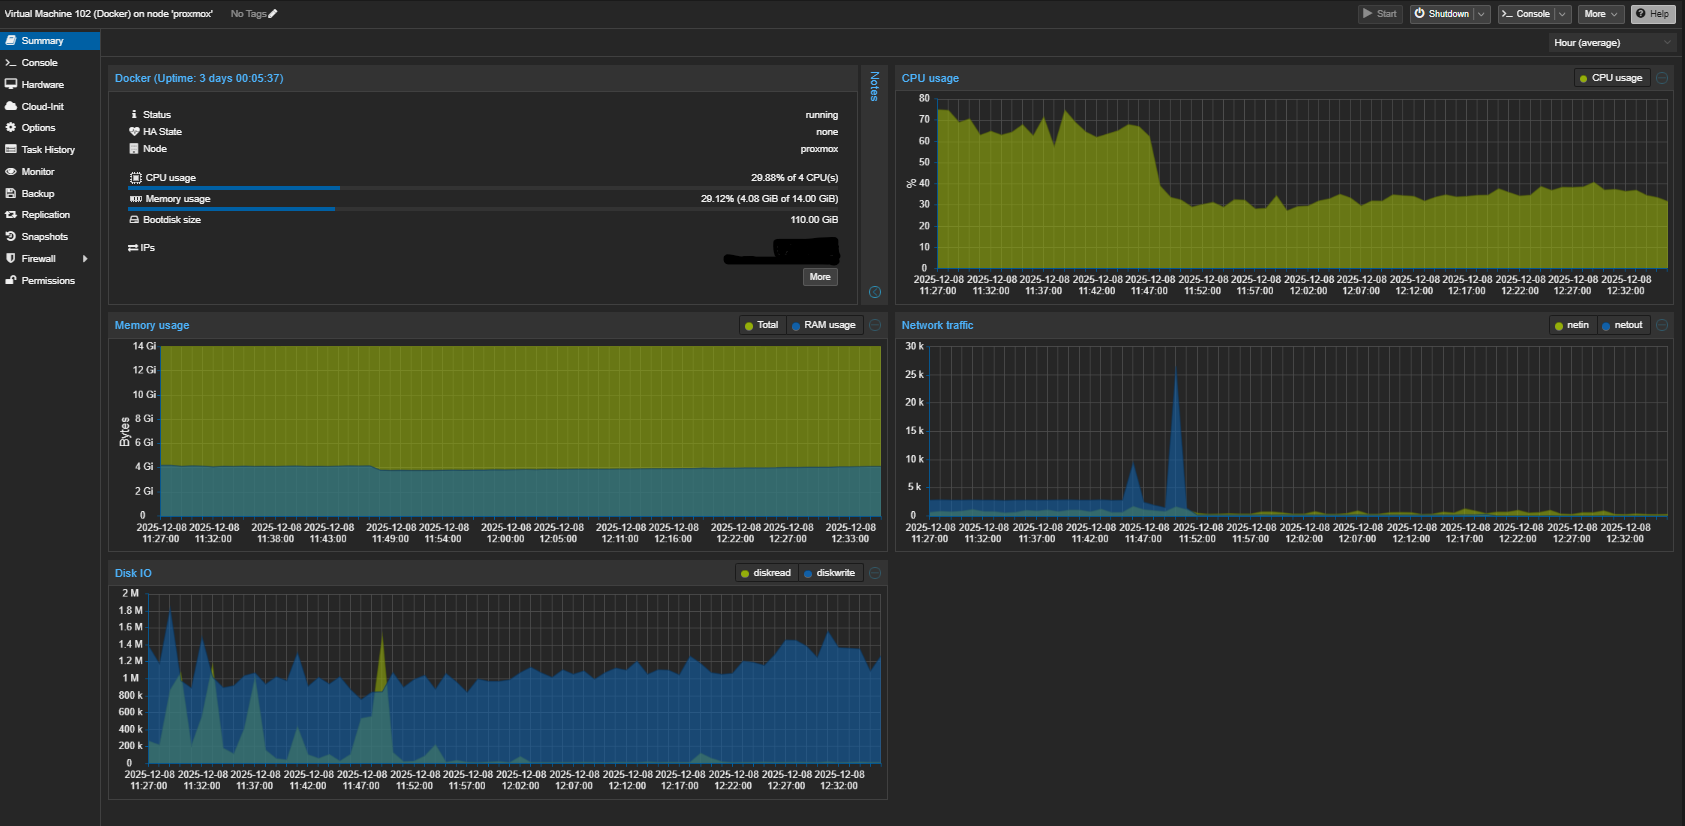
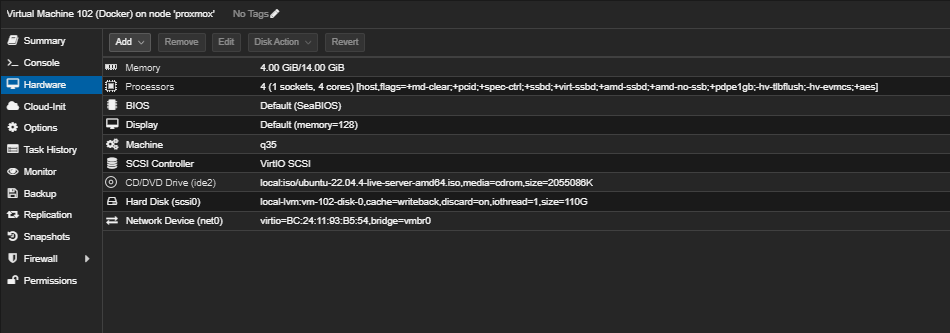
3. Docker Host (Ubuntu Template - VM/CT)
My playground for microservices and quick tests.
-
Setup: A clean Ubuntu with Docker Engine and Docker Compose installed.
-
Why a Separate Machine?: You should never install Docker directly on the Proxmox host. It can destabilize the system. Running Docker inside a separate VM or LXC container is the cleanest method.
-
Usage:
- When I want to try a new security tool (e.g., a C2 server or analysis tool), I pull it from GitHub and run
docker-compose uphere. - I containerize my own small scripts and test them here.
- I use Portainer for visual management.
- When I want to try a new security tool (e.g., a C2 server or analysis tool), I pull it from GitHub and run
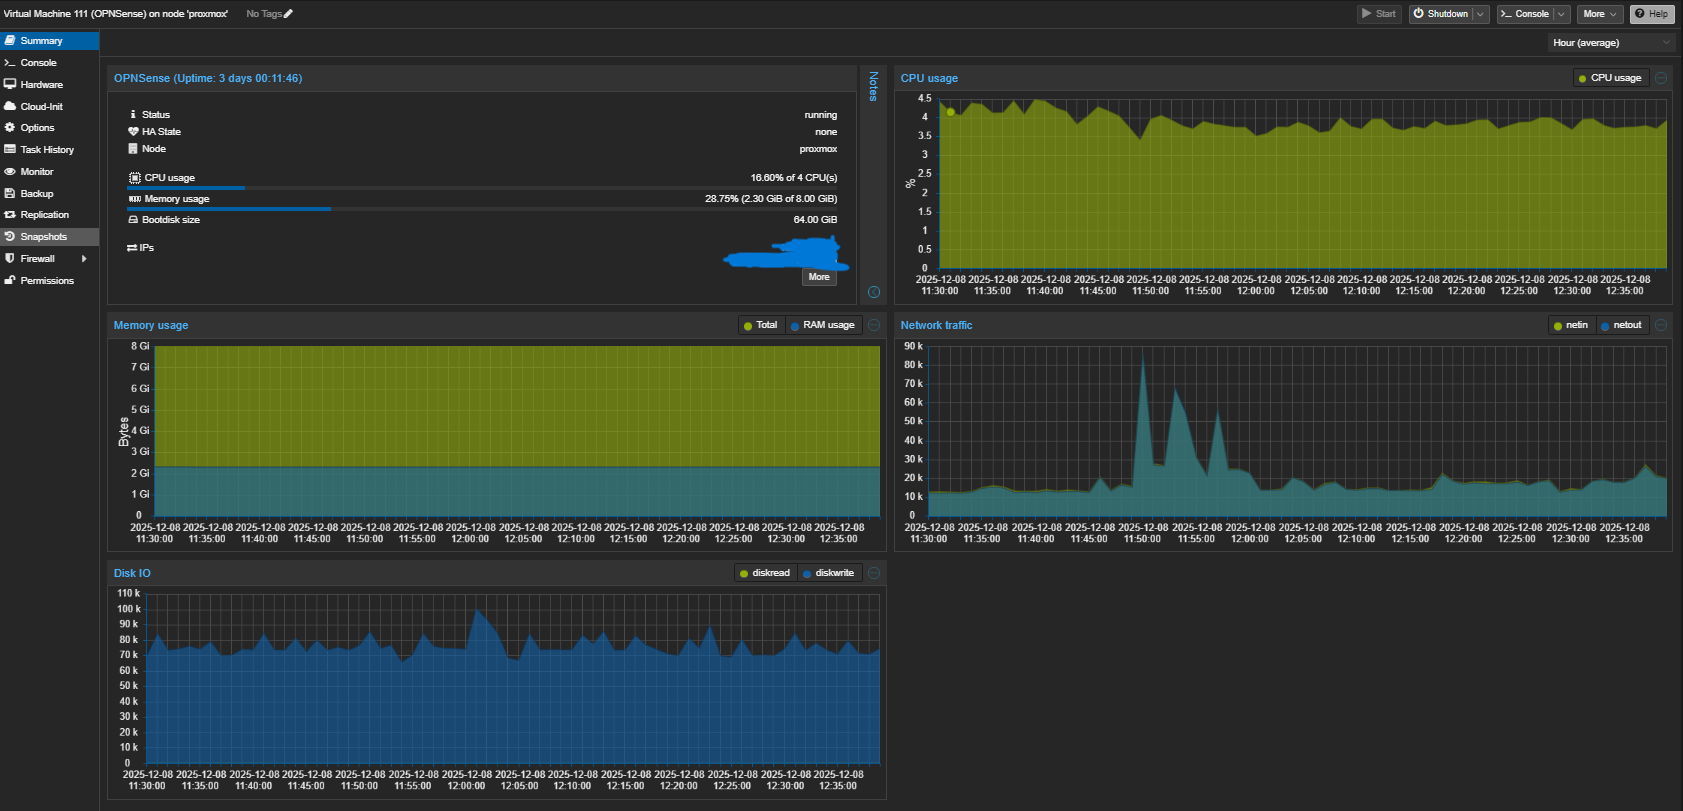
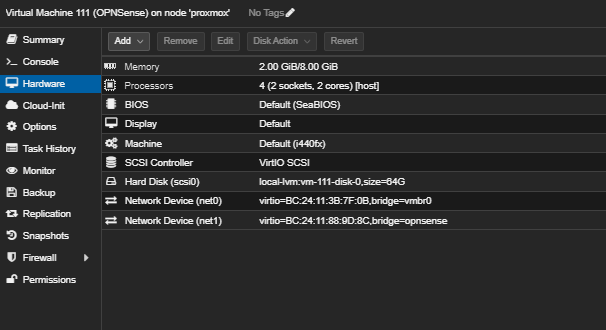
4. OPNsense Firewall & VPN (VM)
The brain of the network, the security guard, and the gateway to the outside world.
-
Setup: OPNsense, a FreeBSD-based fork of pfSense.
-
Configuration:
- Firewall: How do internal machines (Exploit Dev, Docker, etc.) talk to each other and the internet? I write the rules here. For example, I can block the Exploit Dev machine from accessing the normal internet, allowing it only to reach the Tor Gateway, preventing malware from "phoning home" (C2 communication).
- Malware Analysis: When I run a suspicious file, I monitor OPNsense logs live to see which IPs it tries to connect to and which ports it uses.
- Wireguard VPN: Wireguard comes by default (or as an easy plugin) on OPNsense. It is installed to provide secure access to this lab when I'm not home (at a cafe or office).
- Static IP Issue (Cloudflare Tunnel): Since I don't have a static IP on my home internet, I use Cloudflare Tunnel to avoid access issues from outside. This allows me to connect to my Wireguard VPN through a secure tunnel without needing to open ports on the modem or track IP changes.
Conclusion
Proxmox can turn even old hardware into an enterprise-grade cyber security lab. By correctly blending VM and CT (Container) technologies, I can conduct comprehensive work on both the offensive and defensive sides with just 16 GB of RAM. This setup is a cost-effective yet powerful starting point for anyone looking to learn and experiment.